Tuesday, August 29, 2017

Dingy little stand, stand out now


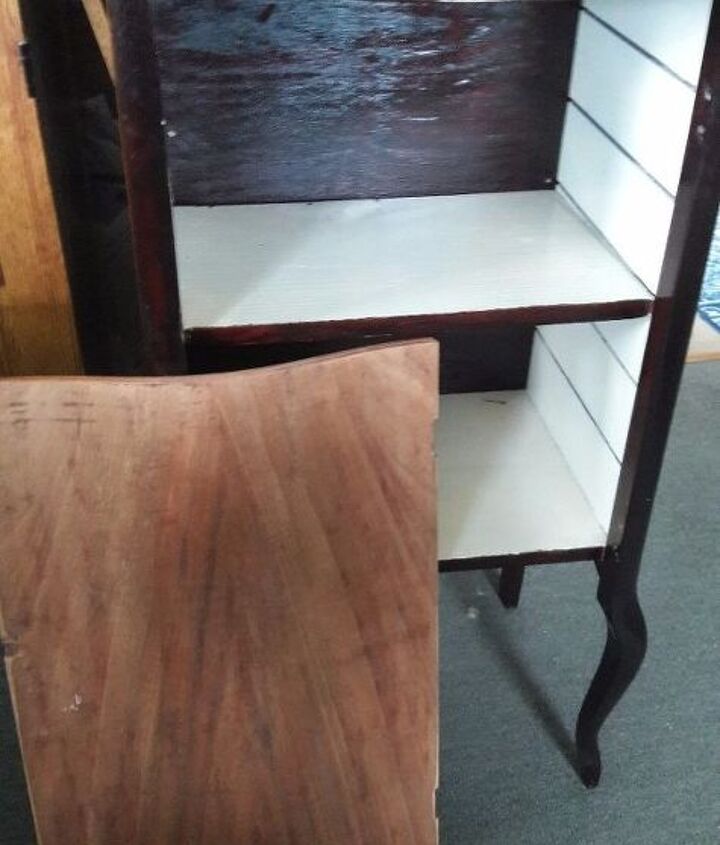
I have a small cabinet that I had stained very dark because it had some marks I couldn't
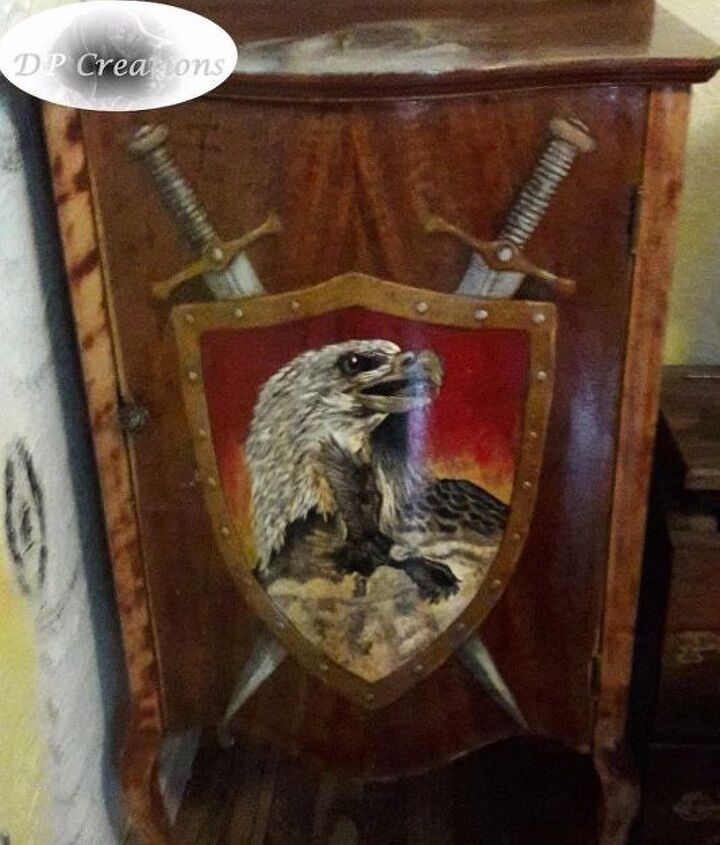
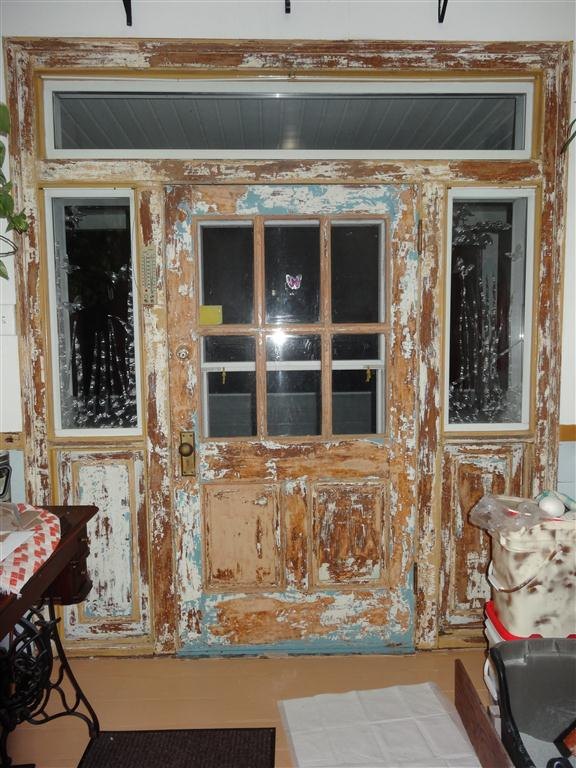
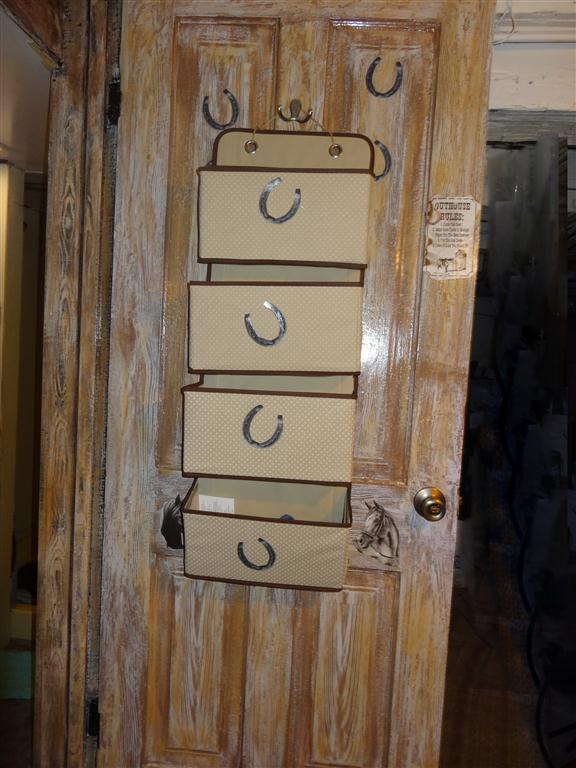
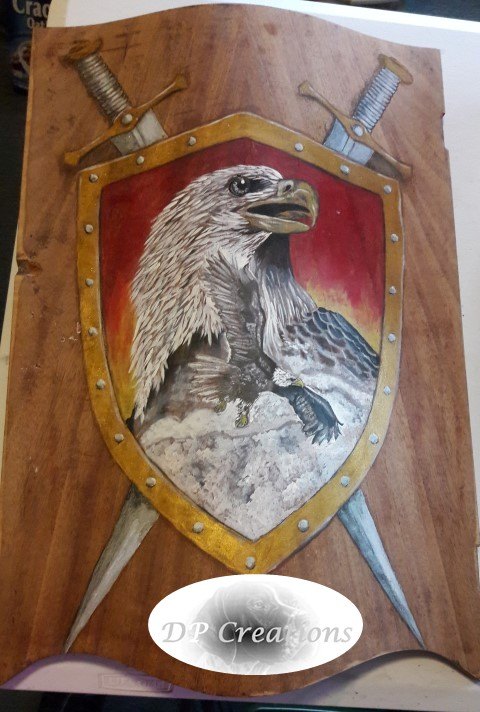
as you can see here I had already stripped the door using citristip and covering with plastic to remove the finish, I had not started on the rest yet but you can see how dark it is. My hubby said because of the shape of the cabinet it needed something like a shield on it so I searched around for different pictures and combined a few to make my own shield

Time: 7 Days Cost: $30 Difficulty: Advanced
  • completed stand really stands out
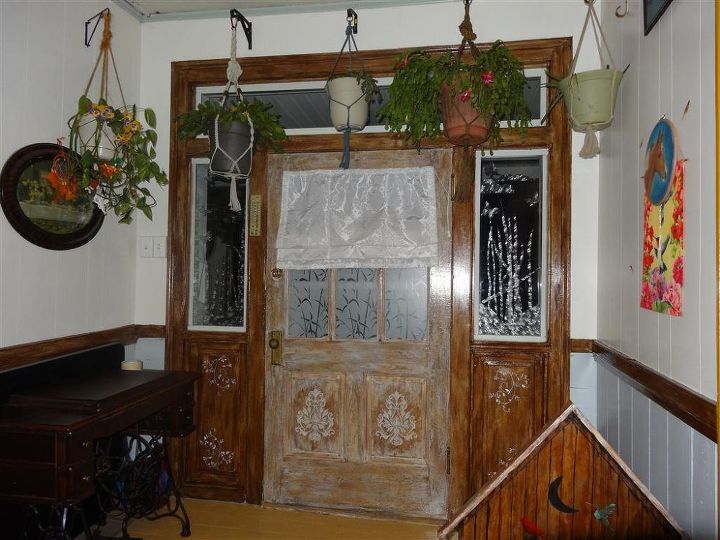
I used blockposters.com to get the right size, taped the printouts together, traced it onto the wood using carbon paper. I used different colors of acrylic paints, used gold for the shield , brown for shadows and white for highlights, silver for the swords and black for shadows, blacks and greys for the the eagles , white for the feathers just painting short lines in white for the feathers, red and yellow for the background and the lower part I just tapped white onto the grey shadows to make it look cloudy like. I can't wait to finish the cabinet and put it all together.
  • completed stand really stands out
This is the shield completed, it only needs sealed
  • completed stand really stands out
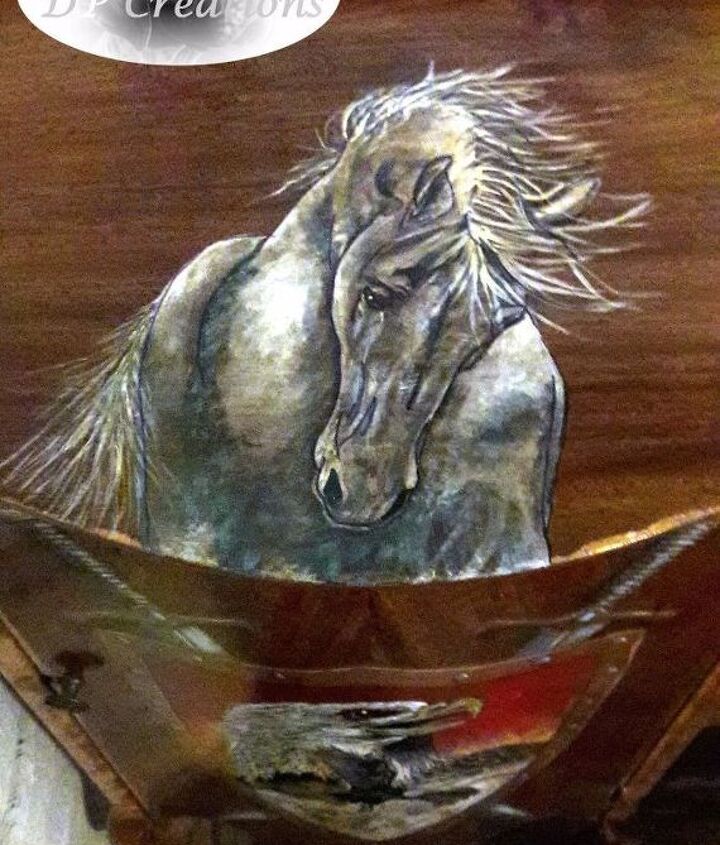
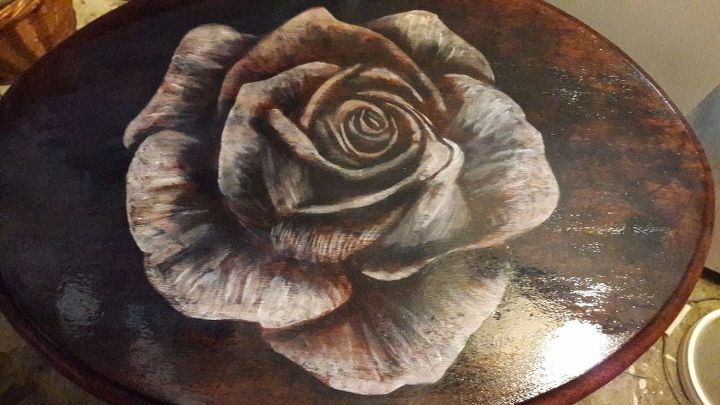
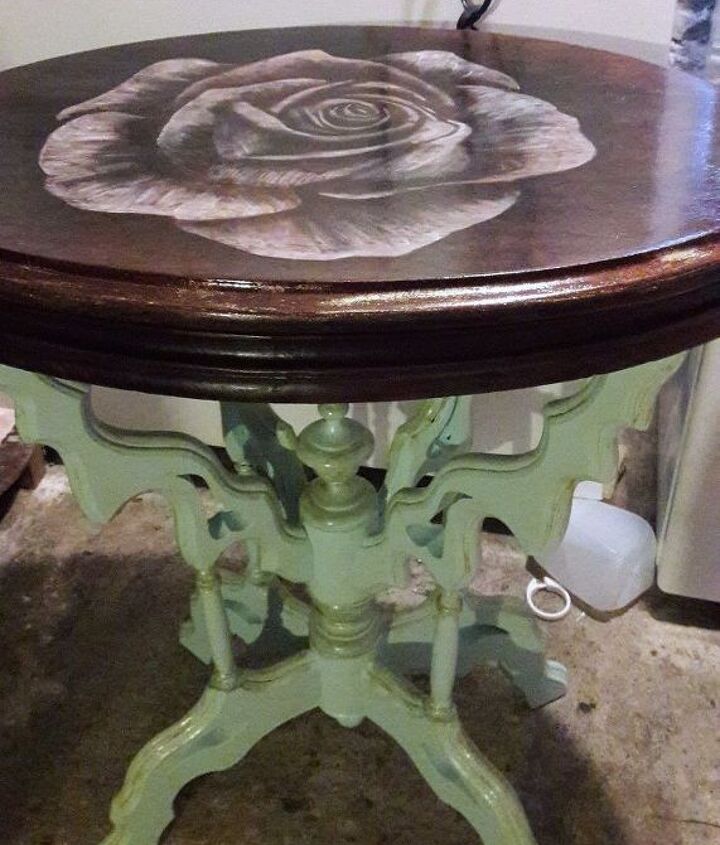
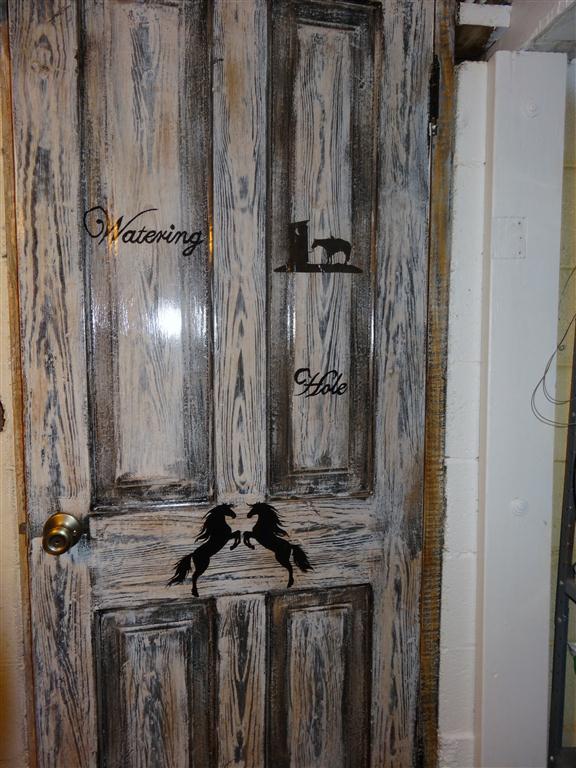
here is a horse I painted on the top to help disguise some of the flaws and also it is the horse to go with the knights shield. The horse was a combination of tracing and drawing, I had to add onto an image I found online. I used black, white acrylic paints to paint it. You could also mod podge an image if you can't paint.
  • completed stand really stands out
This is the completed stand, the side wood and legs came out with awesome grain. I do hope that people are able to see this one. It seems that my posts get hidden and no one finds them.
I feel I made a dingy cabinet very unique and lively

Sunday, June 18, 2017

A Sorry Little Side Table Gets a Workover

  • a sorry little side table gets a workover
I traced the rose onto the table then used a walnut stain to do the outline and shading. The table wasn't real light but you could see the rose but I didn't like the way it was looking. It seemed the stain was so thin that I was getting too much on my rag. I let that dry overnight then used black unicorn spit to create deeper shading then used white unicorn spit to do the highlights to make it pop
The base legs I painted. The picture doesn't show the real color it is more of a mint color, then I used some gold acrylics I had to kind of antique it.
So a junky little table that was ready for the trash got a new life. I am pleased with how it turned out
  • a sorry little side table gets a workover
The base legs I painted. The picture doesn't show the real color it is more of a mint color, then I used some gold acrylics I had to kind of antique it.
I used polycrylic over the entire table to protect it
So a junky little table that was ready for the trash got a new life. I am pleased with how it turned out


Wednesday, March 1, 2017

Bathroom floor glammed

Our tiny bathroom needed some real help. I tore up the linoleum that was ripping and just not looking nice, glad I did there was mold under there. It is a small bathroom in the basement with a cement floor.
  • bathroom floor redo, bathroom ideas, flooring
This is after I tore up the linoleum, sanded the cement and started painting the primer over the floor
  • bathroom floor redo, bathroom ideas, flooring
After the primer was dry I started painting. I tried to make it similar to a picture I found of a beautiful granite counter with waves of browns, blues and whites. It didn't turn out as good as I wanted but it looks very different and clean. I painted the whole floor a blue then started sponging about 4 different brown shades plus 5 different blue layers with a sponge and also a little purple. It took me about 3 hours for this small floor just sponging on different colored layers then I needed a sealer that would not have toxic fumes since the ventilation in this bathroom isn't good at all. I used Deft Interior Exterior Water-Based Polyurethane Finish Gloss and so far it seems to be good and no problems, it dried quickly too. I ended up putting about 6 coats on the floor to seal it and I am hoping that it will hold up
Inside Front door looks so much better
We used paint stripper and scraped for 3 days trying to get down to the bare wood and we got down the the lead type paint and that was all I could do, I would not sand that and the stripper just wasn't doing a good enough job and my hands hurt from so much scraping.
  • front door gets a makeover, doors
This was after scraping for 3 days
  • front door gets a makeover, doors
This is the finished door. I tried to make a wood grain effect on the door and trim but it wasn't working well with the wood graining tool because the wood on the door is a little cupped. (the door is around 200 years old) so I did the best I could at making it look like wood grain. The trim was done the same way but looked strange a similar color so I put a darker paint on it and it still shows some grain. Then I put some stencils on the panels, made the roman blind for the door, put contact paper on the door windows and used contact paper to make little trees on the side windows. I am pleased with the way it turned out.
Bathroom door got a big redo
I have a tiny bathroom but for now it is all we have and I want to make it look nice, I have slowly refinished the cabinets and now the doors, I still need to do the floor but I am not sure what to do. I want to paint but need a sealer that won't kill us to use, But back to the door, It was blue and gold color and was looking pretty sad. I wanted it to look more original but taking all the paint off was not possible and there is probably some lead paint at the bottom of all of it so we are limited and I don't have months to work on one door.
  • my bathroom door got a real updo, bathroom ideas, doors
This is the outside of the door.
After sanding and priming I painted black on the door then used a light grey paint over it and used a graining tool to make the wood grain. When that was dry enough I used some brown and just dry brushed it to give the grain more character. I then traced the lettering onto the door (Watering Hole) and painted that then I printed out the 2 horse, decoupaged them onto the door then carefully painted over them with black to make them look better, I decoupaged the outhouse and horse too then sealed everything with clear water based poly.
  • my bathroom door got a real updo, bathroom ideas, doors
This is the inside of the door
sanding and primered but painted a dark brown over the white primer then used the light grey paint to make the wood grain then went back over the graining with some dry brush browns, mod podged the horse heads on, bought the over the door pockets to hold items in and used hot glue to put a couple horse shoes on it. I also mod podged a Outhouse Rules sign. The trim got a similar treatment- primer, black- grey (was too dark) so I used white over that then dry brushed some browns over it.